How to Upload Csv to Google Cloud

Ingest CSV data to BigQuery using Cloud Data Fusion - Batch ingestion
i. Introduction

Terminal Updated: 2020-02-28
This codelab demonstrates a information ingestion pattern to ingest CSV formatted healthcare information into BigQuery in bulk. We volition use Cloud Data fusion Batch Data pipeline for this lab. Realistic healthcare exam data has been generated and made bachelor in the Google Cloud Storage bucket (gs://hcls_testing_data_fhir_10_patients/csv/) for you.
In this code lab you will acquire:
- How to ingest CSV data (batch-scheduled loading) from GCS to BigQuery using Cloud Information Fusion.
- How to visually build a data integration pipeline in Cloud Data Fusion for loading, transforming and masking healthcare data in bulk.
What do you need to run this codelab?
- You need access to a GCP Project.
- You must be assigned an Owner role for the GCP Project.
- Healthcare information in CSV format, including the header.
If you don't accept a GCP Projection, follow these steps to create a new GCP Project.
Healthcare data in CSV format has been pre-loaded into GCS saucepan at gs://hcls_testing_data_fhir_10_patients/csv/. Each resource CSV file has its unique schema construction. For example, Patients.csv has a different schema than Providers.csv. Pre-loaded schema files can be constitute at gs://hcls_testing_data_fhir_10_patients/csv_schemas.
If yous need a new dataset, you lot can always generate information technology using SyntheaTM. And then, upload it to GCS instead of copying it from the bucket at Re-create input data step.
2. GCP Project Setup
Initialize shell variables for your environs.
To detect the PROJECT_ID, refer to Identifying projects.
<!-- CODELAB: Initialize shell variables -> <!-- Your current GCP Project ID -> export PROJECT_ID=<PROJECT_ID> <!-- A new GCS Saucepan in your current Project - INPUT -> consign BUCKET_NAME=<BUCKET_NAME> <!-- A new BQ Dataset ID - OUTPUT -> consign DATASET_ID=<DATASET_ID>
gsutil mb -50 united states of america gs://$BUCKET_NAME
Go admission to the synthetic dataset.
- From the e-mail address yous are using to login to Cloud Panel, send an electronic mail to hcls-solutions-external+subscribe@google.com requesting to bring together.
- You volition receive an email with instructions on how to ostend the action.

- Apply the option to respond to the email to bring together the grouping. DO NOT click the button.
- Once you receive the confirmation electronic mail, you lot tin proceed to the side by side step in the codelab.
Copy input data.
gsutil -1000 cp -r gs://hcls_testing_data_fhir_10_patients/csv gs://$BUCKET_NAME
Create a BigQuery Dataset.
bq mk --location=us --dataset $PROJECT_ID:$DATASET_ID
3. Cloud Data Fusion Environment Setup
Follow these steps to enable the Cloud Information Fusion API and grant required permissions:
Enable APIs.
- Become to the GCP Console API Library.
- From the projects listing, select your project.
- In the API Library, select the API you want to enable. If you demand assist finding the API, use the search field and/or the filters.
- On the API folio, click ENABLE.
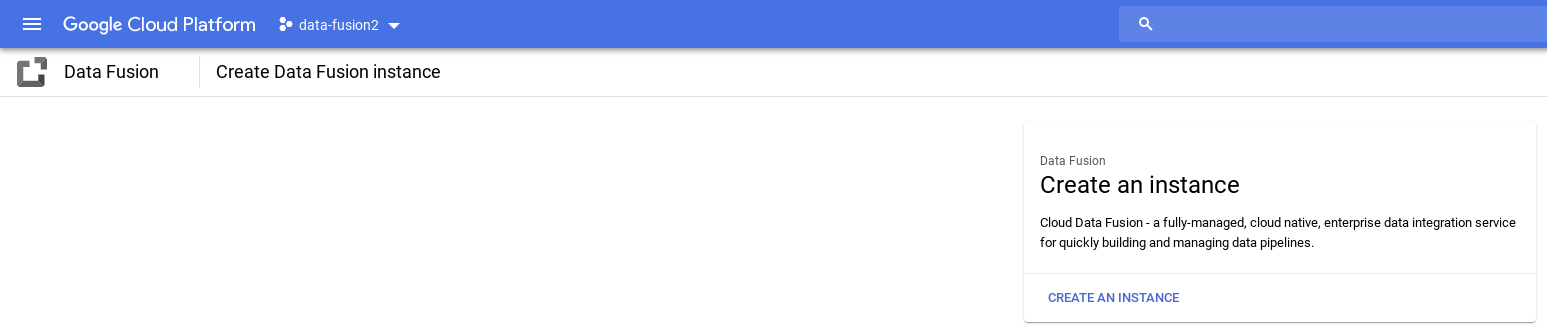
Create a Deject Information Fusion example.
- In GCP Console, select your ProjectID.
- Select Data Fusion from the left carte du jour, then click the CREATE AN Example button in the middle of the page (1st creation), or click the CREATE INSTANCE button at the top menu (additional creation).

- Provide the example name. Select Enterprise.
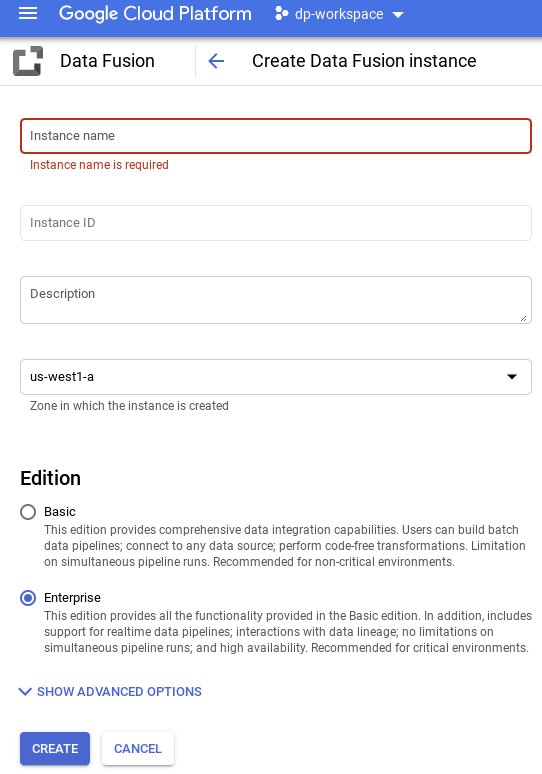
- Click the CREATE button.
Setup example permissions.
After creating an example, use the following steps to grant the service business relationship associated with the instance permissions on your project:
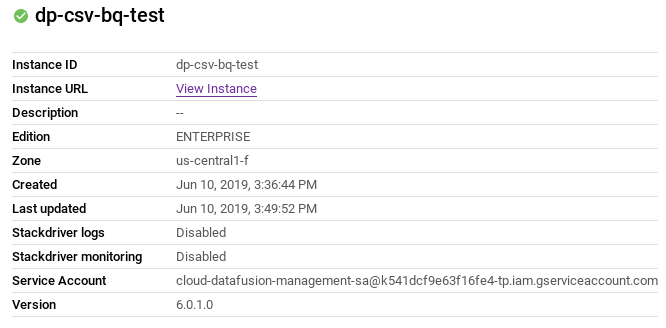
- Navigate to the example particular folio by clicking the instance proper noun.
- Copy the service account.
- Navigate to the IAM Page of your project.
- On the IAM permissions page, we will now add together the service account equally a new member and grant it the Cloud Information Fusion API Service Agent role. Click the Add button, so paste the "service account" in the New members field and select Service Management -> Deject Data Fusion API Server Agent role.
-
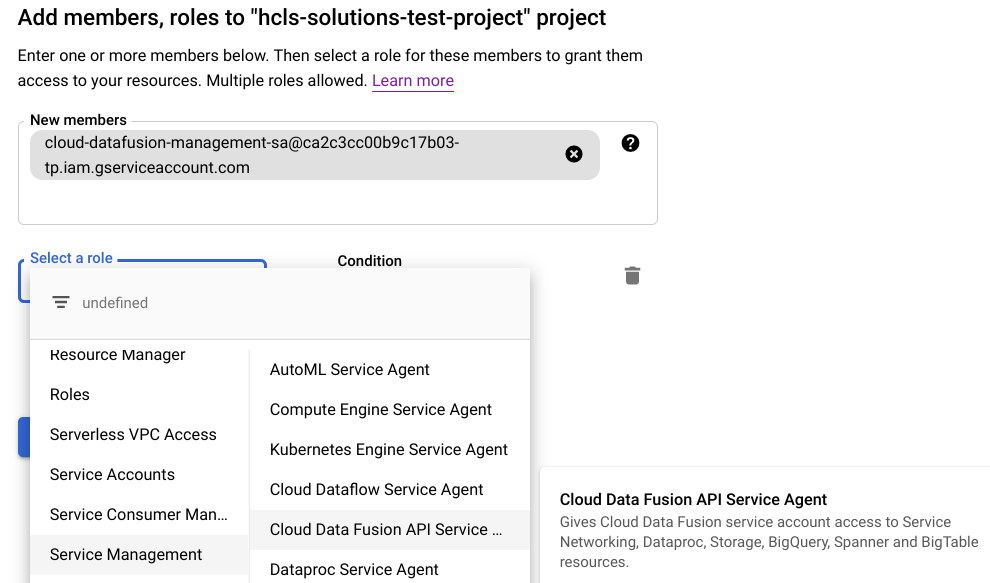
- Click Save.
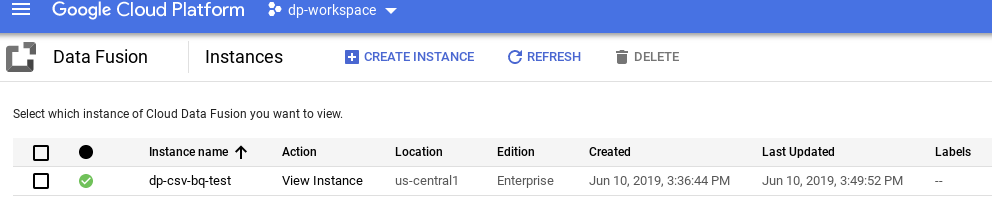
Once these steps are washed, you can start using Cloud Data Fusion by clicking the View Case link on the Cloud Data Fusion instances page, or the details page of an instance.
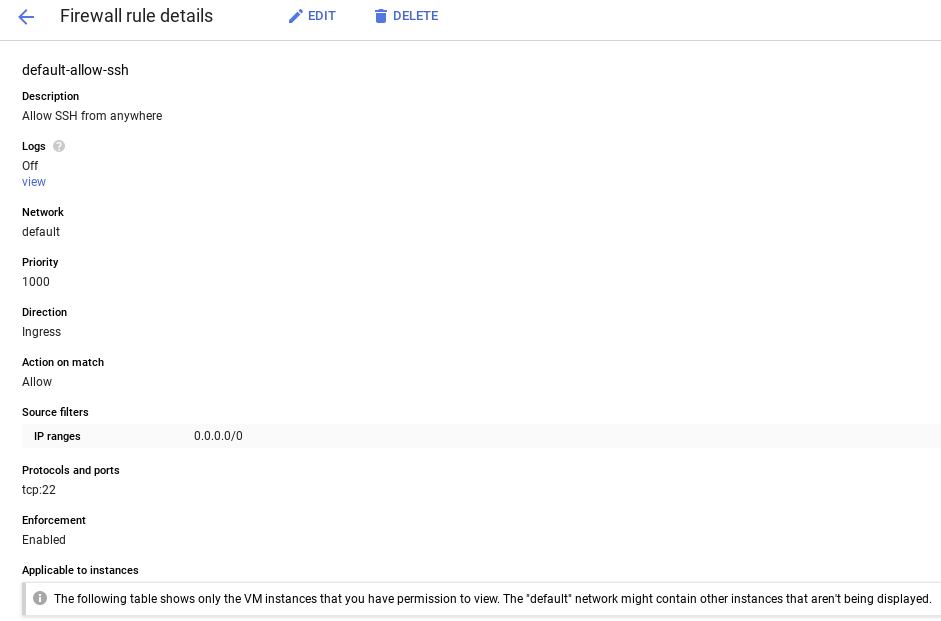
Set upwardly the firewall rule.
- Navigate to GCP Console -> VPC Network -> Firewall rules to check if the default-allow-ssh rule exists or not.

- If not, add a firewall rule that allows all ingress SSH traffic to the default network.
Using command line:
gcloud beta compute --project={PROJECT_ID} firewall-rules create default-let-ssh --direction=INGRESS --priority=grand --network=default --activeness=Let --rules=tcp:22 --source-ranges=0.0.0.0/0 --enable-logging Using UI: Click Create Firewall Rule and fill out the information:

4. Build a Schema for transformation
Now that we have the Cloud Fusion surround in GCP let's build a schema. Nosotros need this schema for transformation of the CSV data.
- In the Cloud Information Fusion window, click the View Example link in the Activeness cavalcade. You volition be redirected to some other page. Click the provided url to open Cloud Data Fusion instance. Your pick to click "Start Tour" or "No, Thanks" button at the Welcome popup.
- Expand the "hamburger" menu, select Pipeline -> Studio
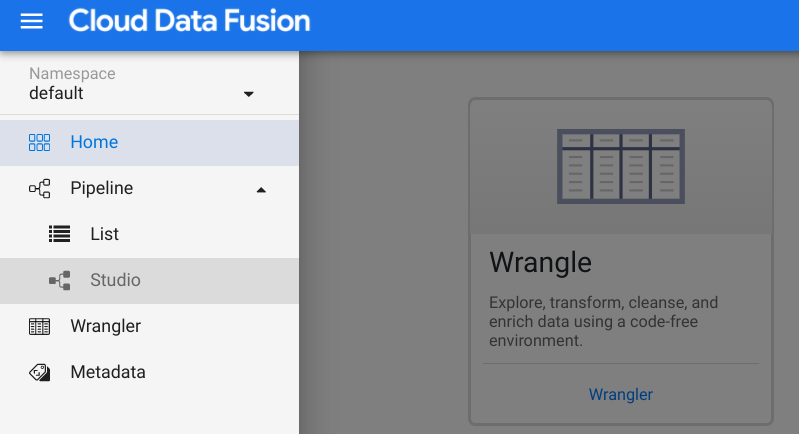
- Under the Transform department in the Plugin palette on the left, double-click on the Wrangler node, which will appear in the Data Pipelines UI.
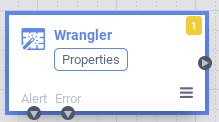
- Point to the Wrangler node and click Properties. Click the Wrangle button, then select a .csv source file (for case, patients.csv), which must accept all data fields to build the desired schema.
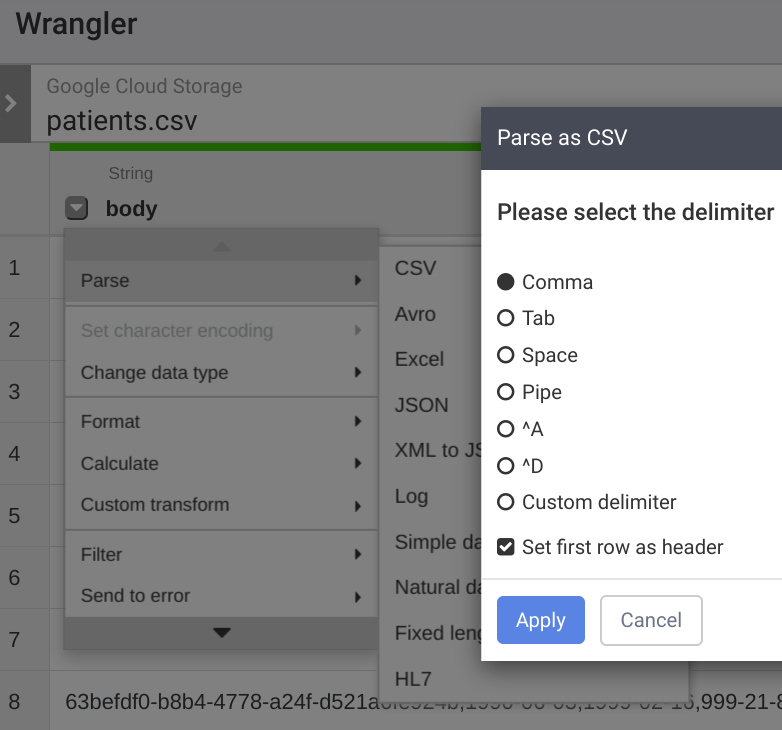
- Click the Down arrow (Column Transformations) next to each column name (for example, body).

- By default, the initial import will assume there is only ane column in your information file. To parse it equally a CSV, cull Parse → CSV, then select the delimiter and cheque the "Fix start row as header" box every bit appropriate. Click the Apply button.
- Click down arrow next to Body field, select Delete Cavalcade to remove Body field. Additionally, you can try out other transformations such as removing columns, changing data type for some columns (default is "cord" type), splitting columns, setting column names, etc.
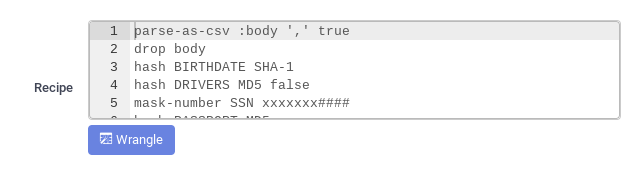
- The "Columns" and "Transformation steps" tabs show output schema and the Wrangler's recipe. Click Utilise at the upper right corner. Click the Validate button. The green "No errors institute" indicates success.
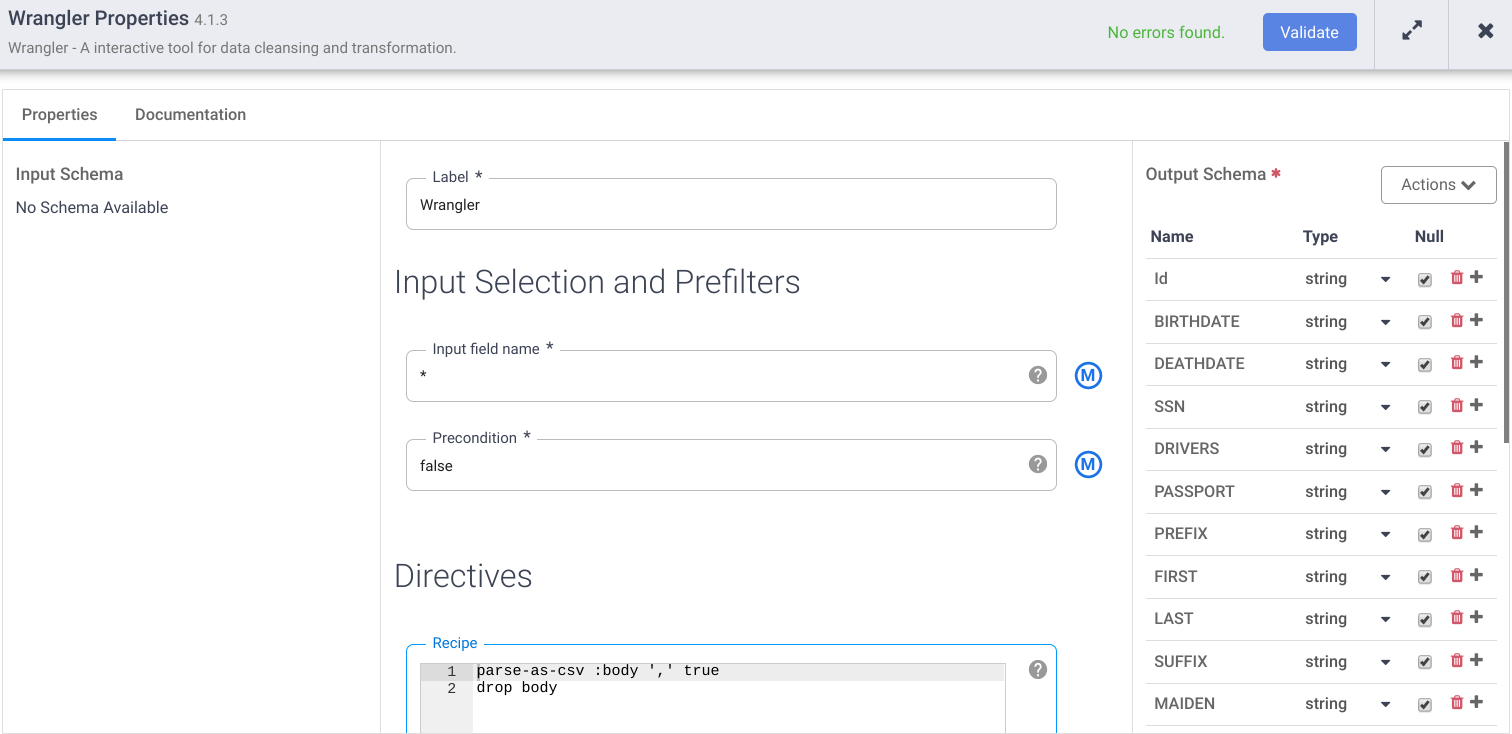
- In Wrangler Properties, click the Actions dropdown to Export the desired schema into your local storage for future Import if needed.
- Salvage the Wrangler Recipe for time to come usage.
parse-as-csv :body ',' true driblet trunk
- To close the Wrangler Properties window, click the X button.
5. Build nodes for the pipeline
In this department we volition build the pipeline components.
- In the Data Pipelines UI, in the upper left, you should see that Information Pipeline - Batch is selected every bit the pipeline type.

- There are different sections on the left panel every bit Filter, Source, Transform, Analytics, Sink, Conditions and Actions, Error Handlers and Alerts where you tin can select a node or nodes for the pipeline.
Source node
- Select the Source node.
- Under the Source section in the Plugin palette on the left, double-click on the Google Cloud Storage node, which appears in the Information Pipelines UI.
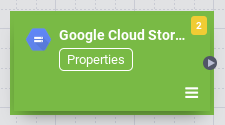
- Point to the GCS source node and click Properties.
- Fill in the required fields. Set following fields:
- Label = {whatever text}
- Reference name = {whatever text}
- Project ID = auto detect
- Path = GCS URL to saucepan in your current project. For example, gs://$BUCKET_NAME/csv/
- Format = text
- Path Field = filename
- Path Filename Only = true
- Read Files Recursively = truthful
- Add field 'filename' to the GCS Output Schema by clicking the + push button.
- Click Documentation for detailed explanation. Click the Validate push. The green "No errors found" indicates success.
- To shut the GCS Properties, click the Ten push.
Transform node
- Select the Transform node.
- Nether the Transform section in the Plugin palette on the left, double-click the Wrangler node, which appears in the Data Pipelines UI. Connect GCS source node to Wrangler transform node.
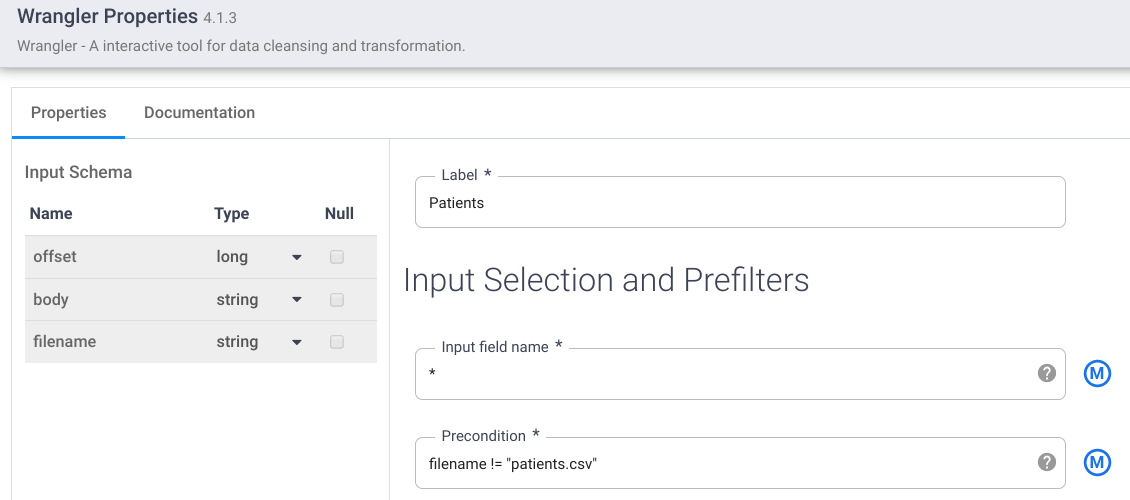
- Point to the Wrangler node and click Properties.
- Click Actions drop down and select Import to import a saved schema (for example: gs://hcls_testing_data_fhir_10_patients/csv_schemas/ schema (Patients).json), and paste the saved recipe from previous section.
- Or, reuse the Wrangler node from the section: Build a schema for transformation.
- Fill in the required fields. Gear up following fields:
- Label = {any text}
- Input field name = {*}
- Precondition = {filename != "patients.csv"} to distinguish each input file (for example,. patients.csv, providers.csv, allergies.csv, etc.) from the Source node.
- Add together a JavaScript node to execute the user-provided JavaScript that farther transforms the records. In this codelab, we utilize the JavaScript node to get a timestamp for each tape update. Connect Wrangler transform node to JavaScript transform node. Open JavaScript Properties, and add the following function:
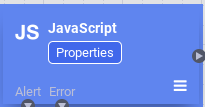
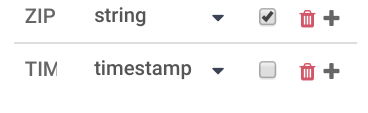
office transform(input, emitter, context) { input.TIMESTAMP = (new Date()).getTime()*1000; emitter.emit(input); } - Add the field named TIMESTAMP to the Output Schema (if it doesn't exist) past clicking the + sign. Select the timestamp equally the data type.
- Click Documentation for a detailed explanation. Click the Validate push button to validate all input information. Green "No errors institute" indicates success.
- To shut the Transform Properties window, click the X button.
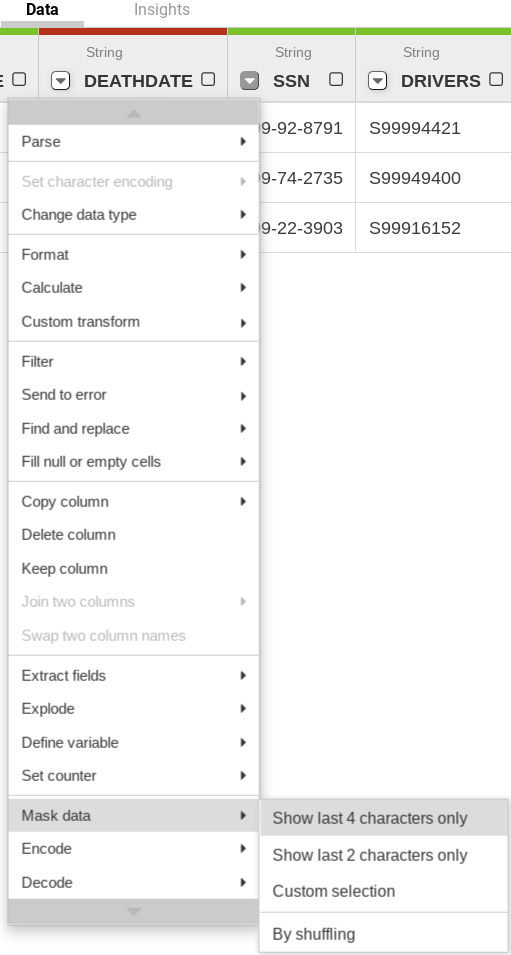
Data masking and de-identification
- Yous can select individual data columns by clicking the down pointer in the column and applying masking rules under the Mask information option as per your requirements (for example, SSN column).
- You tin can add more than Directives in the Recipe window of the Wrangler node. For example, using the hash directive with the hashing algorithm following this syntax for de-identification purpose:
hash <column> <algorithm> <encode> <cavalcade>: proper name of the column <algorithm>: Hashing algorithm (i.east. MD5, SHA-i, etc.) <encode>: default is true (hashed digest is encoded as hex with left-padding zeros). To disable hex encoding, set <encode> to imitation.
Sink node
- Select the sink node.
- Nether the Sink section in the Plugin palette on the left, double click on BigQuery node, which will appear in the Data Pipeline UI.
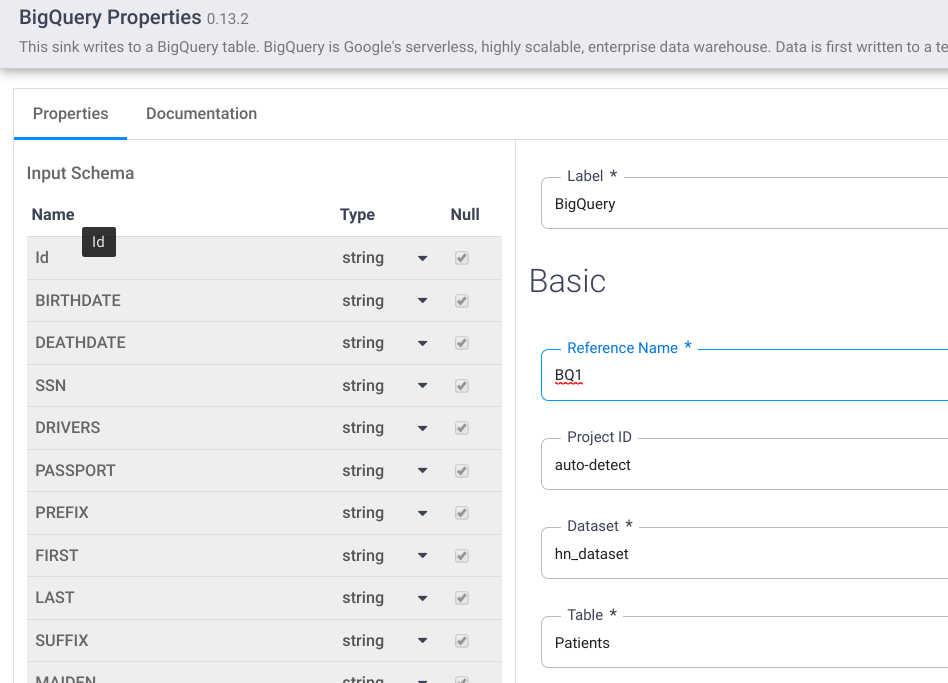
- Point to the BigQuery sink node and click Backdrop.

- Fill in required fields. Set following fields:
- Label = {whatever text}
- Reference name = {any text}
- Project ID = motorcar detect
- Dataset = BigQuery dataset used in current project (i.e. DATASET_ID)
- Table = {tabular array name}
- Click Documentation for a detailed explanation. Click the Validate button to validate all input data. Greenish "No errors institute" indicates success.
- To close the BigQuery Backdrop, click the Ten push.
vi. Build Batch data pipeline
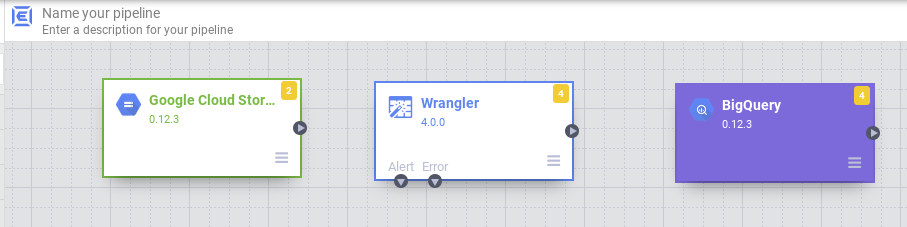
Connecting all nodes in a pipeline
- Drag a connexion arrow > on the right edge of the source node and drop on the left border of destination node.
- A pipeline can take multiple branches that get input files from the same GCS Source node.

- Name the pipeline.
That's it. You've just created your first Batch information pipeline and can deploy and run the pipeline.
Send pipeline alerts via email (optional)
To utilize the Pipeline Alarm SendEmail feature, the configuration requires a mail service server to be setup for sending mail from a virtual automobile case. See the reference link below for more information:
Sending electronic mail from an instance | Compute Engine Documentation
In this codelab, nosotros ready upwards a mail relay service through Mailgun using the following steps:
- Follow the instructions at Sending email with Mailgun | Compute Engine Documentation to set up an account with Mailgun and configure the email relay service. Additional modifications are below.
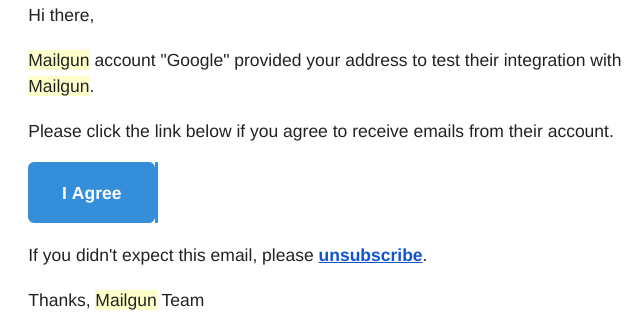
- Add all recipients' email addresses to Mailgun'southward authorized list. This list can exist found in Mailgun>Sending>Overview pick on the left panel.

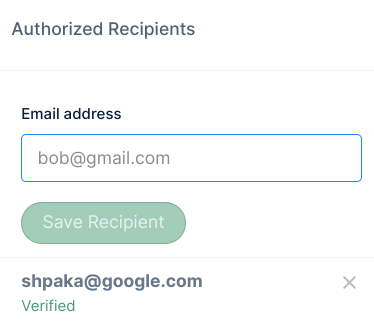
Once the recipients click "I Concur" on the email sent from support@mailgun.net, their email addresses are saved in the authorized list to receive pipeline alert emails.
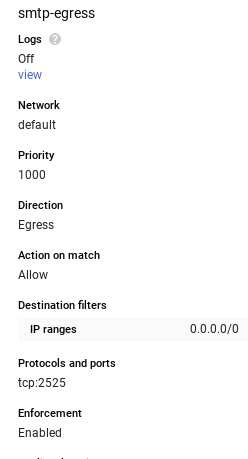
- Step 3 of "Earlier you begin" section - create a Firewall rule equally following:
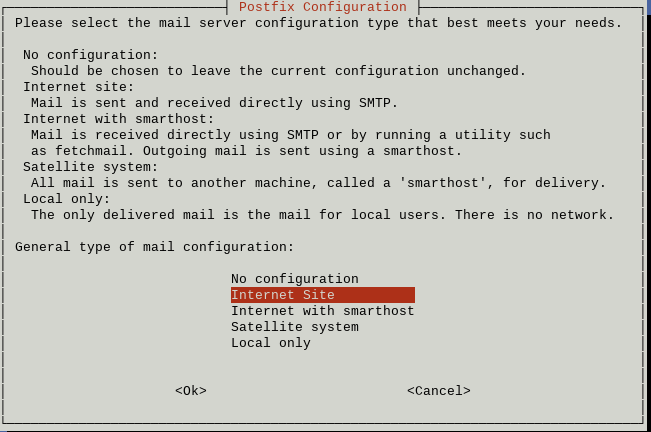
- Stride three of "Configuring Mailgun as a mail relay with Postfix". Select Net Site or Internet with smarthost, instead of Local Only as mentioned in the instructions.
- Pace 4 of "Configuring Mailgun every bit a mail relay with Postfix". Edit vi /etc/postfix/main.cf to add 10.128.0.0/9 at the end of mynetworks.

- Edit six /etc/postfix/main.cf to change default smtp (25) to port 587.

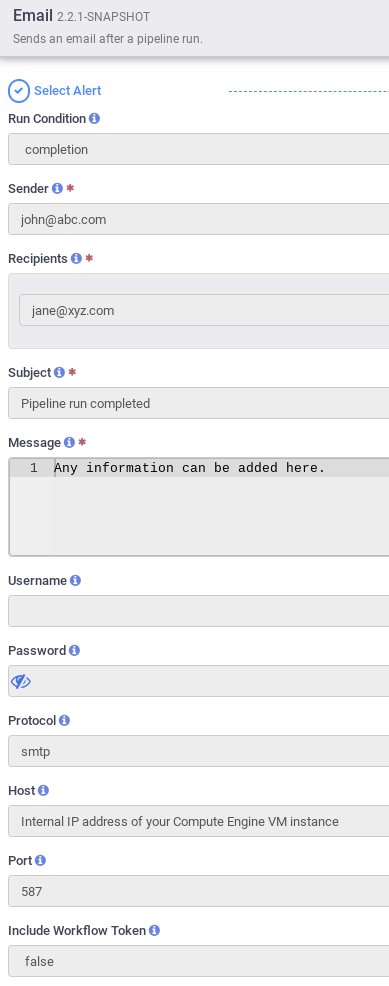
- At the upper-correct corner of Data Fusion studio, click Configure. Click Pipeline alert and click + button to open up the Alerts window. Select SendEmail.

- Fill out the Email configuration form. Select completion, success, or failure from Run Condition dropdown for each alert type. If Include Workflow Token = false, only the data from the Message field is sent. If Include Workflow Token = truthful, the data from the Message field and Workflow Token detailed data issent. You must use lowercase for Protocol. Use any "fake" email other than your company email address for Sender.
seven. Configure, Deploy, Run/Schedule Pipeline

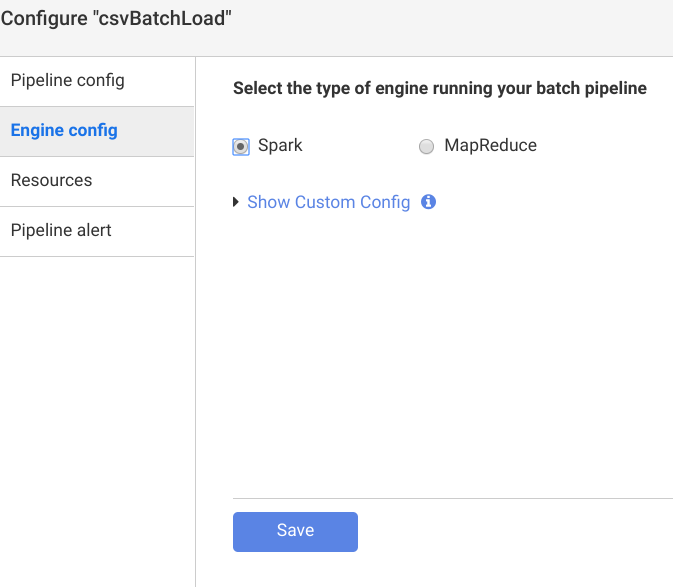
- In the upper-right corner of Data Fusion studio, click Configure. Select Spark for Engine Config. Click Save in Configure window.
- Click Preview to Preview data**,** and click **Preview** again to toggle back to the previous window. You lot can also **Run** the pipeline in Preview fashion.

- Click Logs to view logs.
- Click Save to salve all changes.
- Click Import to import saved pipeline configuration when edifice new pipeline.
- Click Export to export a pipeline configuration.
- Click Deploy to deploy the pipeline.
- Once deployed, click Run and wait for the pipeline to run to completion.
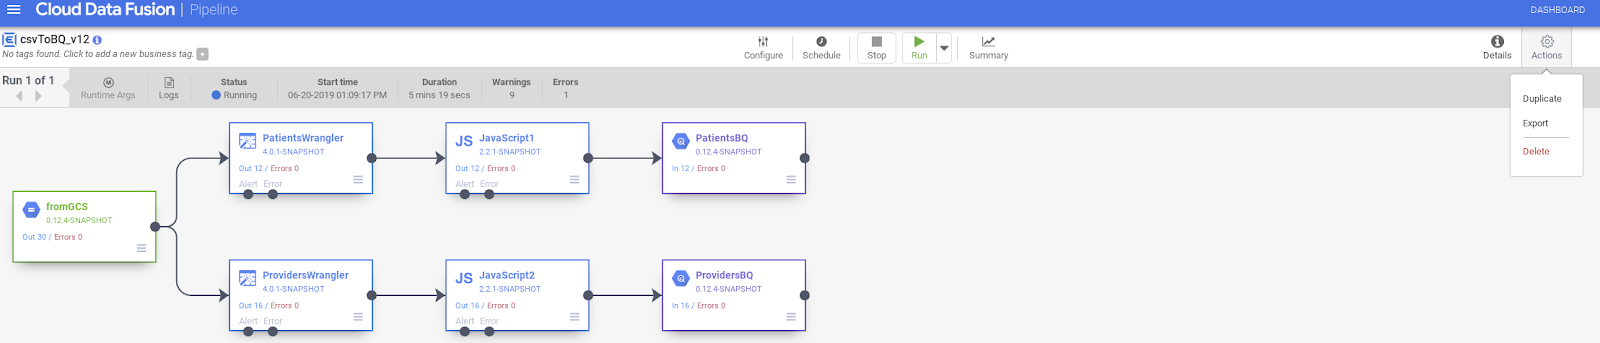
- Yous tin Duplicate the pipeline by selecting Duplicate nether the Actions push.
- You can Export Pipeline Configuration by selecting Export nether the Actions button.
- Click Inbound triggers or Outbound triggers on the left or right edge of the Studio window to set pipeline triggers if desired.
- Click Schedule to schedule the pipeline to run and load information periodically.

- Summary shows charts of Run history, records, error logs and warnings.
viii. Validation
- The Validate pipeline was executed successfully.

- Validate if BigQuery Dataset has all tables.
bq ls $PROJECT_ID:$DATASET_ID
tableId Type Labels Time Partitioning ----------------- ------- -------- ------------------- Allergies TABLE Careplans TABLE Conditions Tabular array Encounters TABLE Imaging_Studies Table Immunizations Tabular array Medications TABLE Observations TABLE Organizations TABLE Patients TABLE Procedures TABLE Providers TABLE - Receive alert emails (if configured).
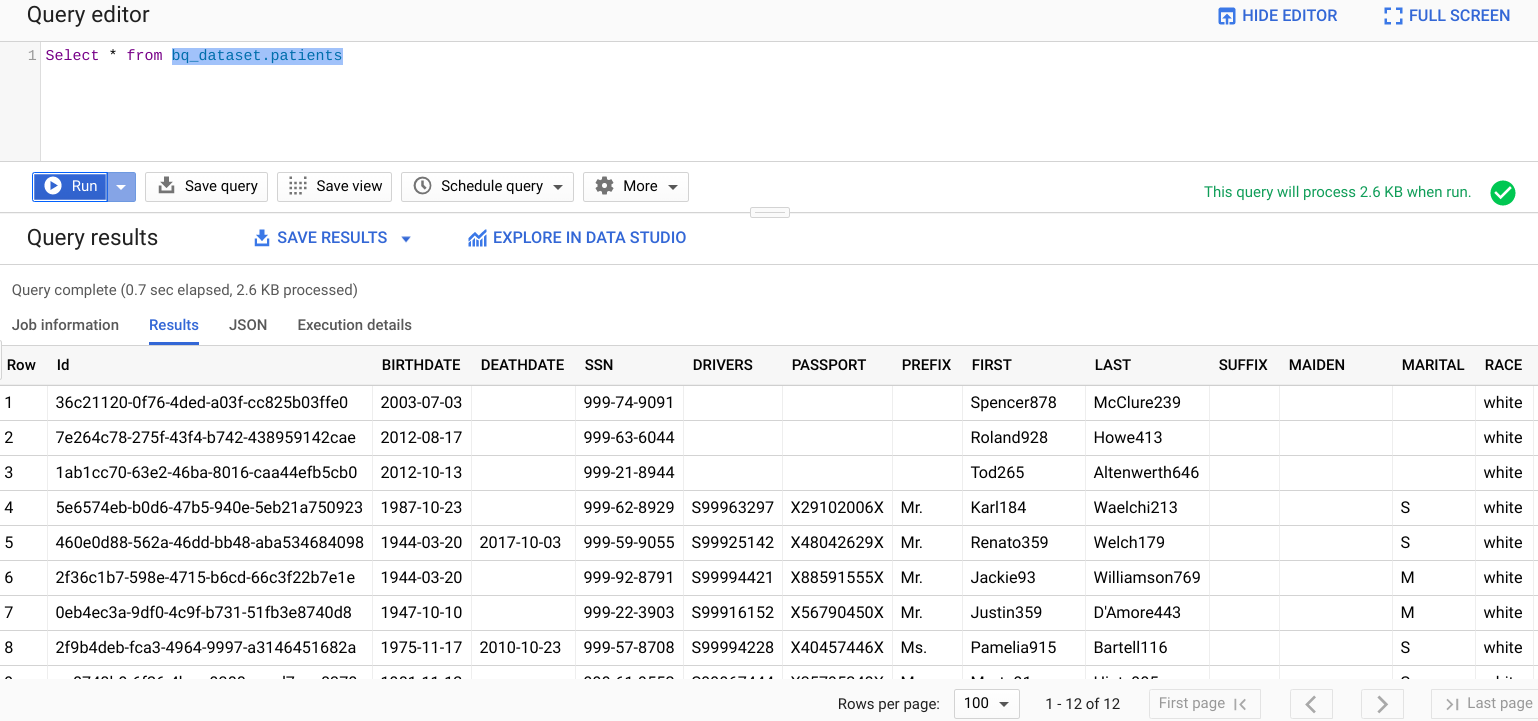
Viewing the results
To view the results after the pipeline runs:
- Query the table in the BigQuery UI. GO TO THE BIGQUERY UI
- Update the query below to your own project proper noun, dataset, and tabular array.
nine. Cleaning up
To avoid incurring charges to your Google Deject Platform account for the resources used in this tutorial:
After yous've finished the tutorial, yous can clean up the resources that you created on GCP so they won't take upward your quota, and yous won't be billed for them in the future. The following sections depict how to delete or plough off these resource.
Deleting the BigQuery dataset
Follow these instructions to delete the BigQuery dataset you created as part of this tutorial.
Deleting the GCS Bucket
Follow these instructions to delete the GCS saucepan you lot created every bit function of this tutorial.
Deleting the Cloud Data Fusion example
Follow these instructions to delete your Cloud Data Fusion instance.
Deleting the project
The easiest way to eliminate billing is to delete the project that you created for the tutorial.
To delete the project:
- In the GCP Console, go to the Projects page. GO TO THE PROJECTS PAGE
- In the project list, select the project you lot want to delete and click Delete.
- In the dialog, blazon the project ID, and then click Close down to delete the projection.
10. Congratulations
Congratulations, you've successfully completed the code lab to ingest healthcare information in BigQuery using Cloud Information Fusion.
You imported CSV data from Google Deject Storage into BigQuery.
You visually built the information integration pipeline for loading, transforming and masking healthcare information in bulk.
You now know the key steps required to beginning your Healthcare Data Analytics journeying with BigQuery on Google Cloud Platform.
Except as otherwise noted, the content of this folio is licensed under the Artistic Commons Attribution 4.0 License, and code samples are licensed nether the Apache ii.0 License. For details, see the Google Developers Site Policies. Java is a registered trademark of Oracle and/or its affiliates.
richardsonforescon.blogspot.com
Source: https://codelabs.developers.google.com/codelabs/batch-csv-cdf-bq/
0 Response to "How to Upload Csv to Google Cloud"
Postar um comentário